Understanding the Drying and Curing Process of Floor Coatings: What to Expect
May 8, 2024
It's essential to understand the drying and curing process to ensure optimal results and longevity of your floor coating.
Applying a fresh coat of floor coating can transform the look and functionality of your space, whether it's a garage, workshop, or commercial facility. In this blog post, we'll delve into the intricacies of the drying and curing process of floor coatings, providing valuable insights into what to expect during each stage.
Drying vs. Curing
Before we dive into the specifics, let's clarify the difference between drying and curing. Drying refers to the process by which solvents or water evaporate from the coating, leaving behind a dry surface. Curing, on the other hand, involves a chemical reaction that occurs between the coating and the surrounding air, resulting in the formation of a strong, durable bond.
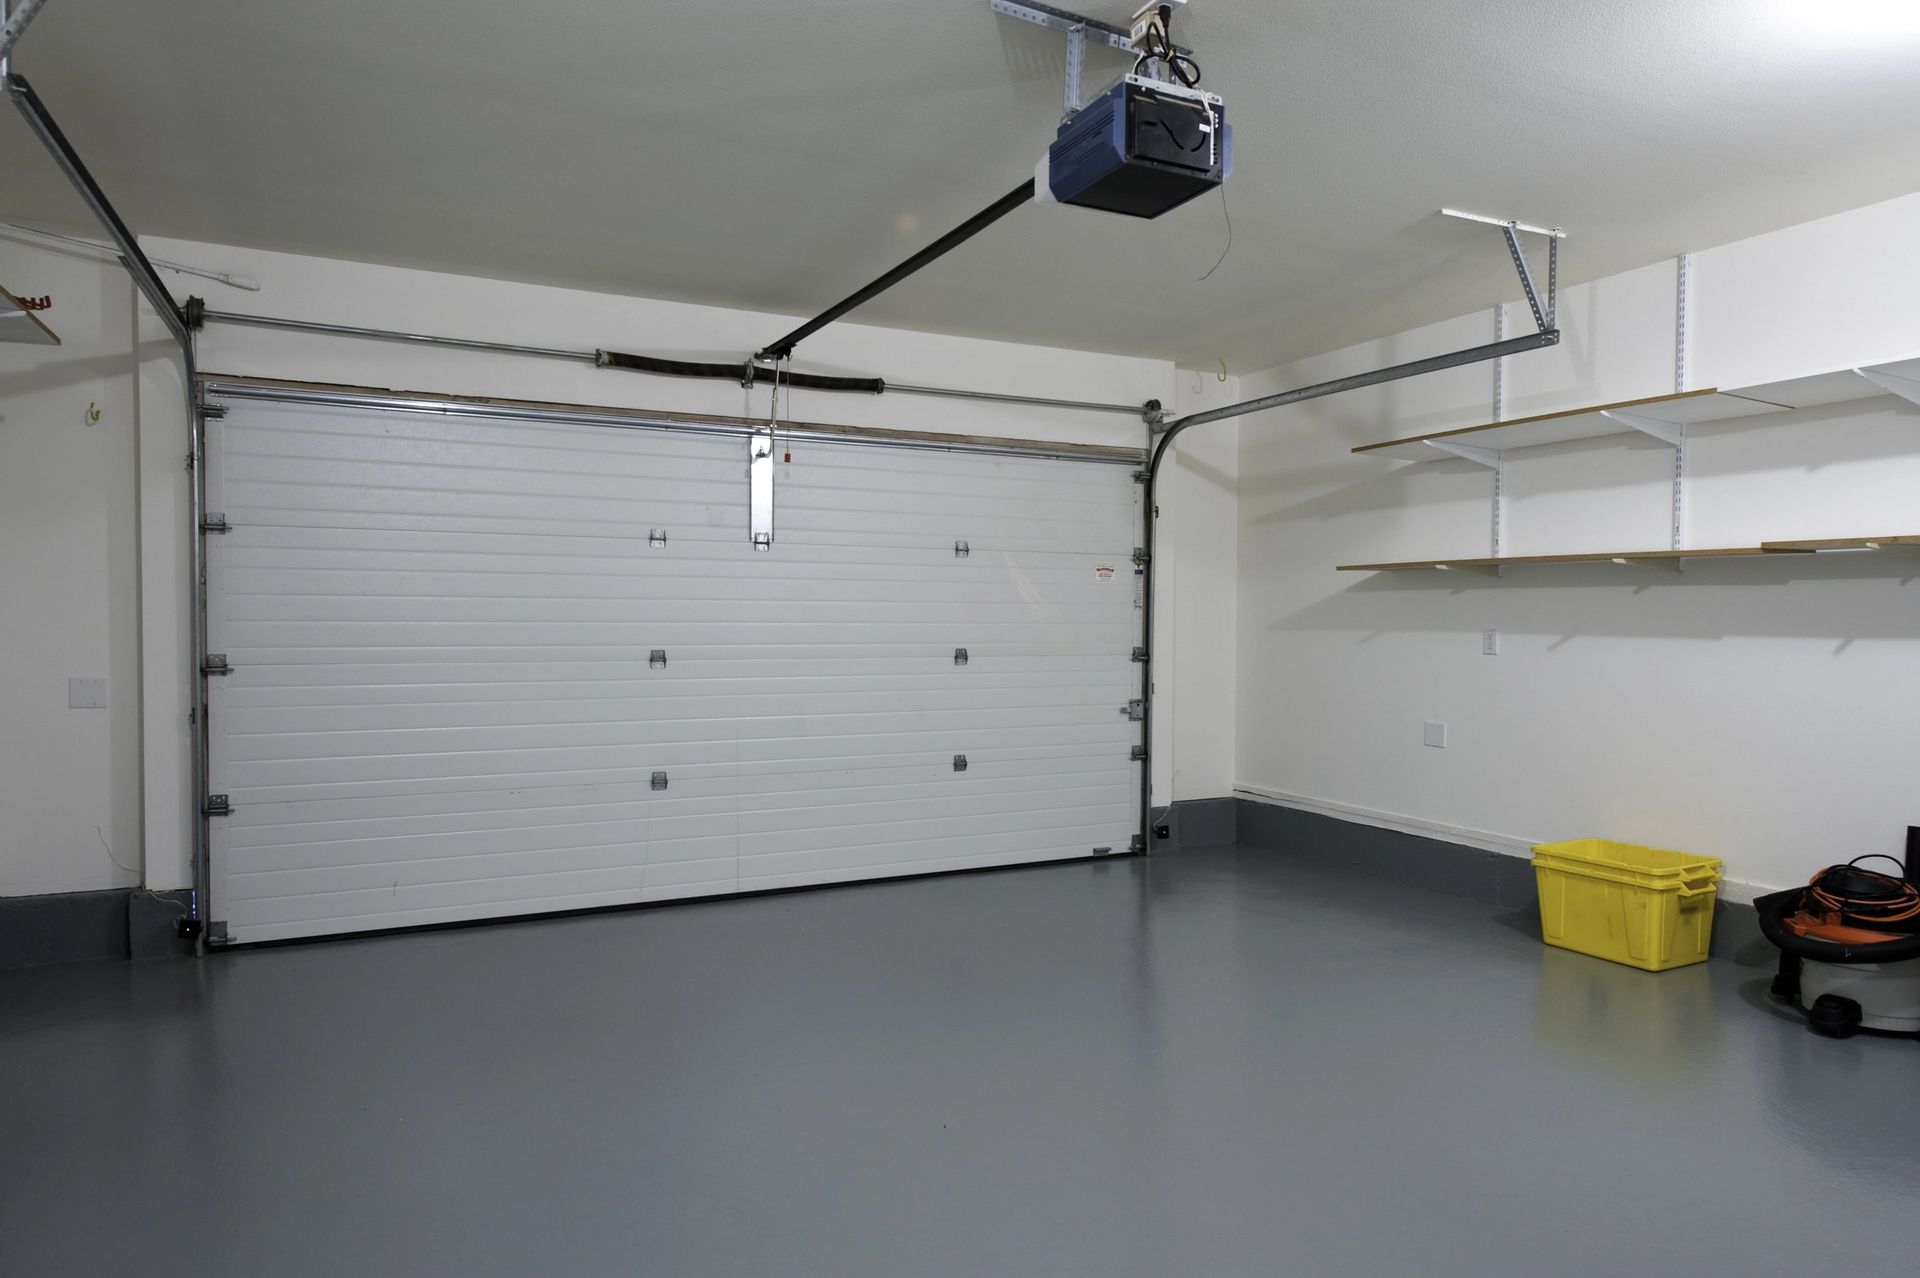
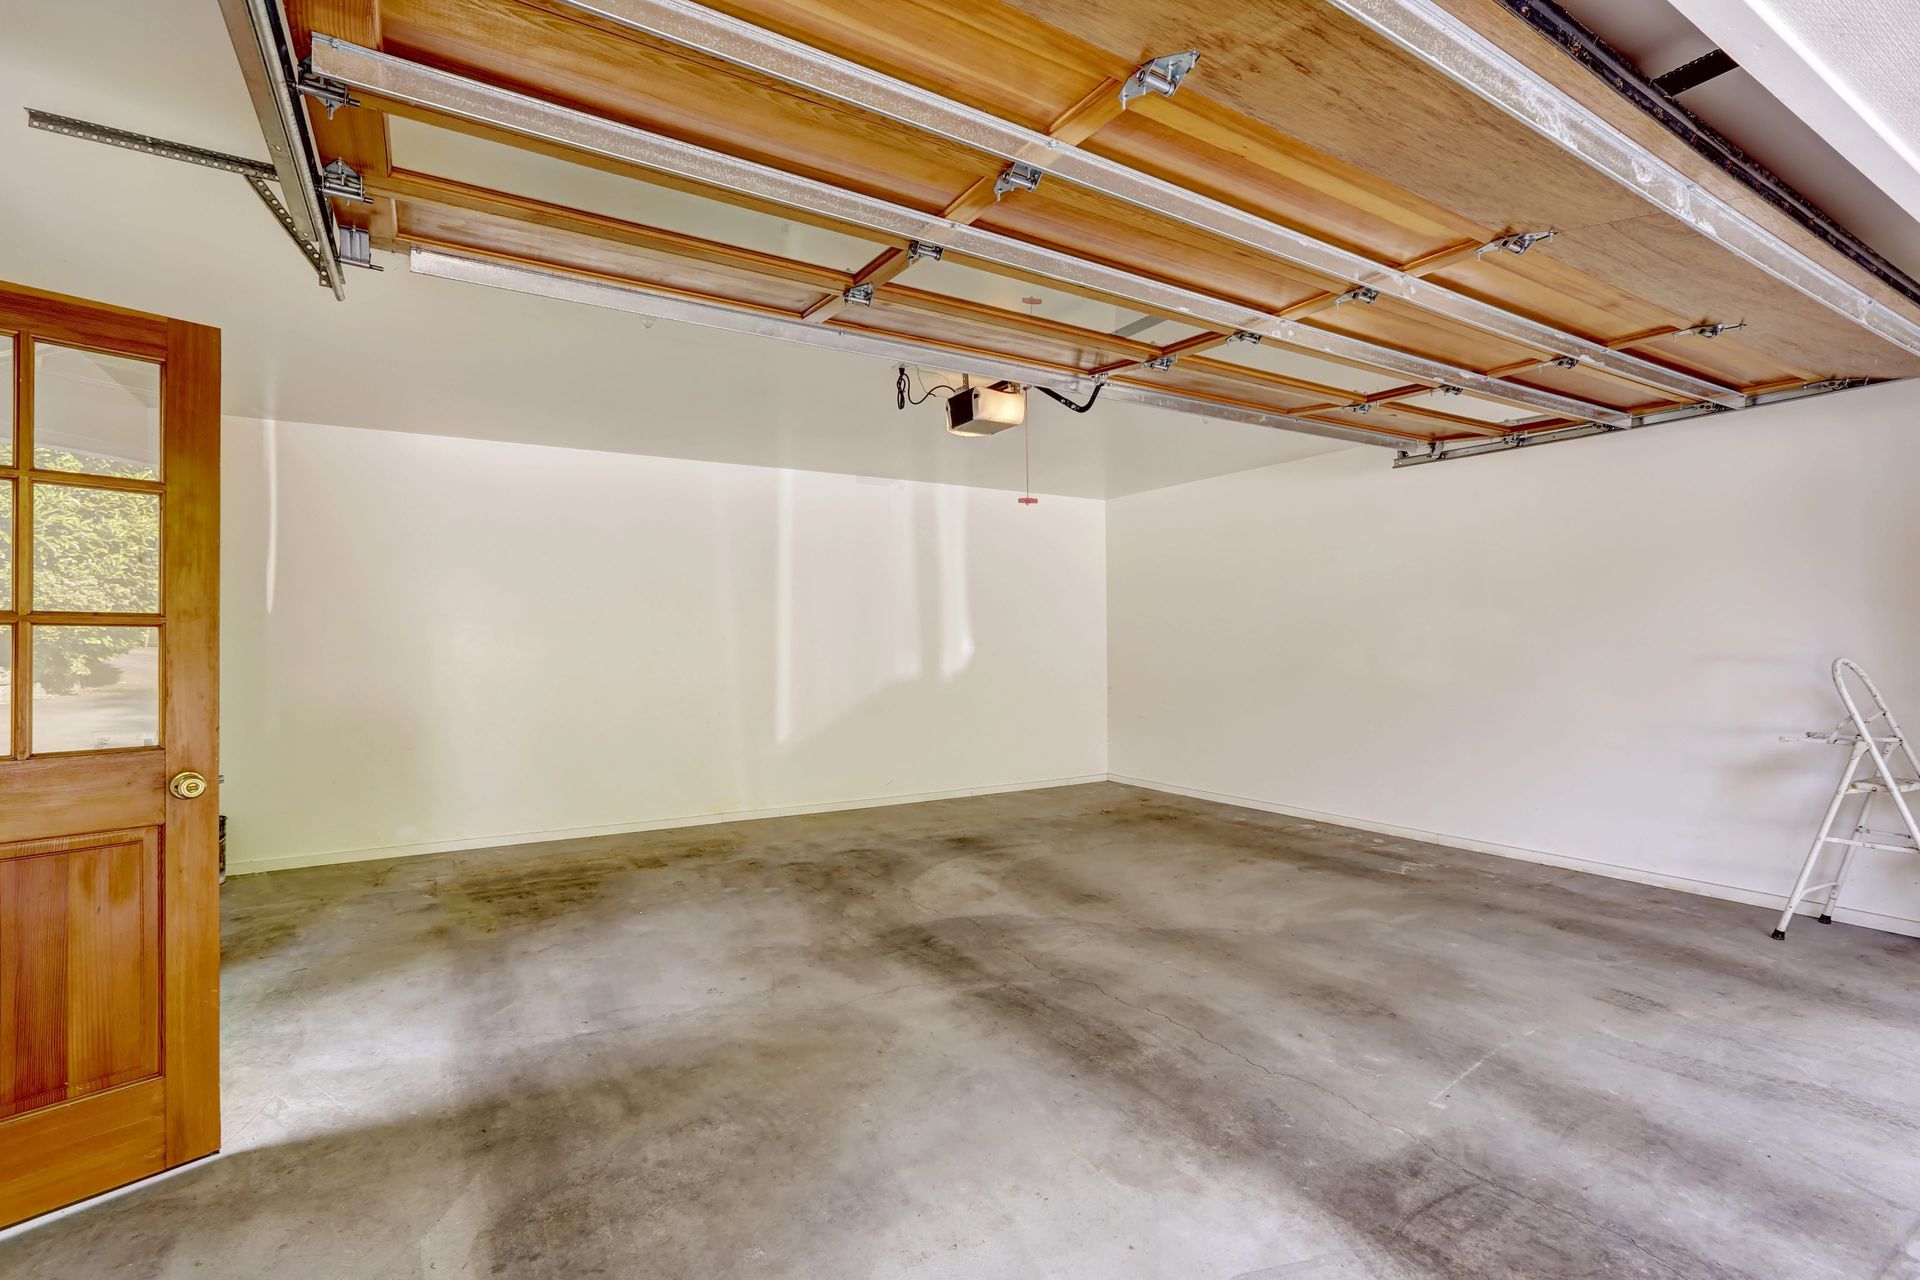
Initial Drying Phase
After the floor coating is applied, the initial drying phase begins. During this stage, solvents or water in the coating evaporate, leaving the surface tack-free to the touch. Depending on the type of coating and environmental conditions, this phase typically takes anywhere from a few hours to a day or more. It's essential to allow adequate drying time before walking or placing objects on the coated surface to prevent damage or blemishes.
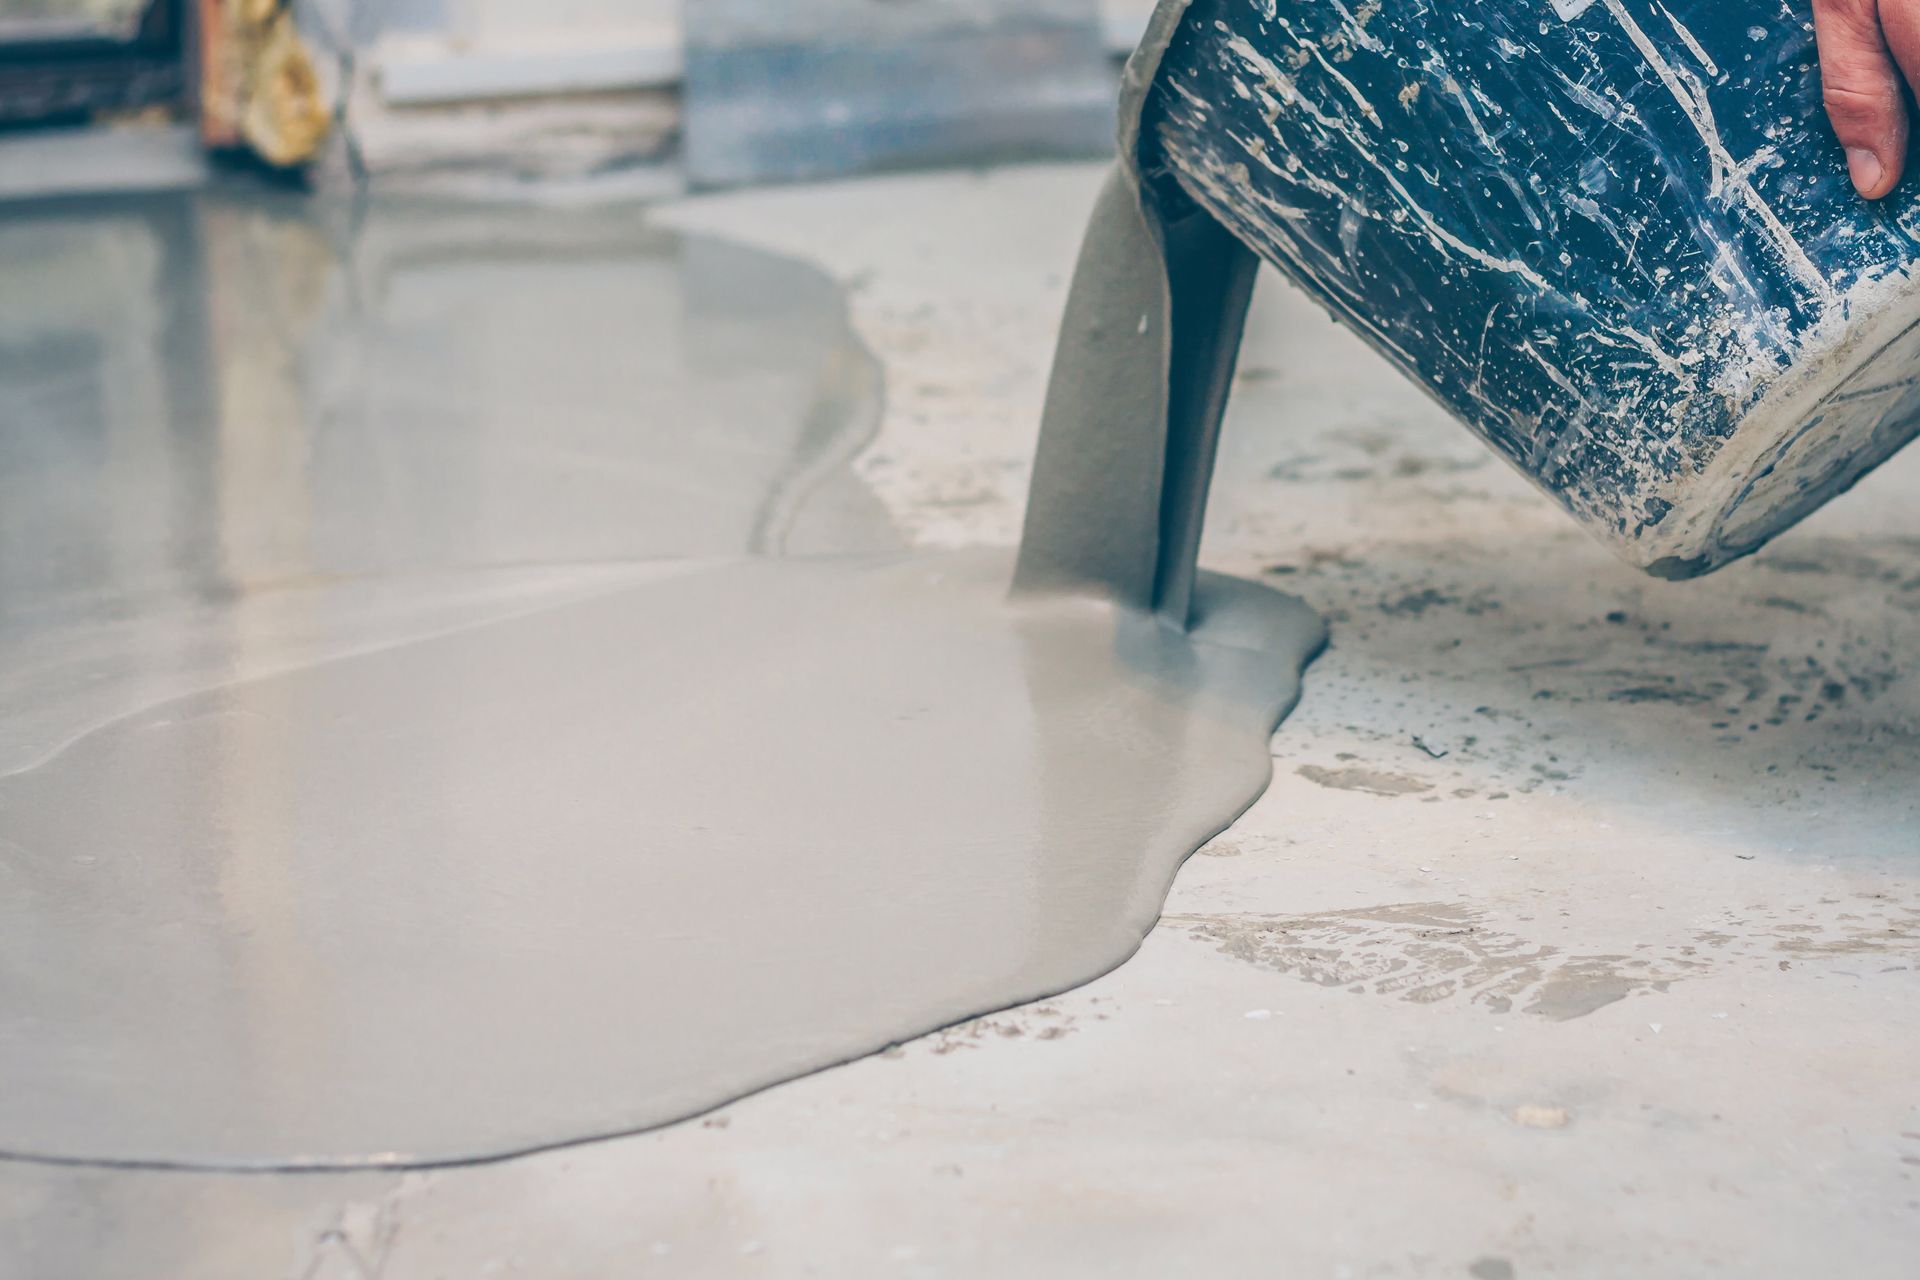
Curing Process
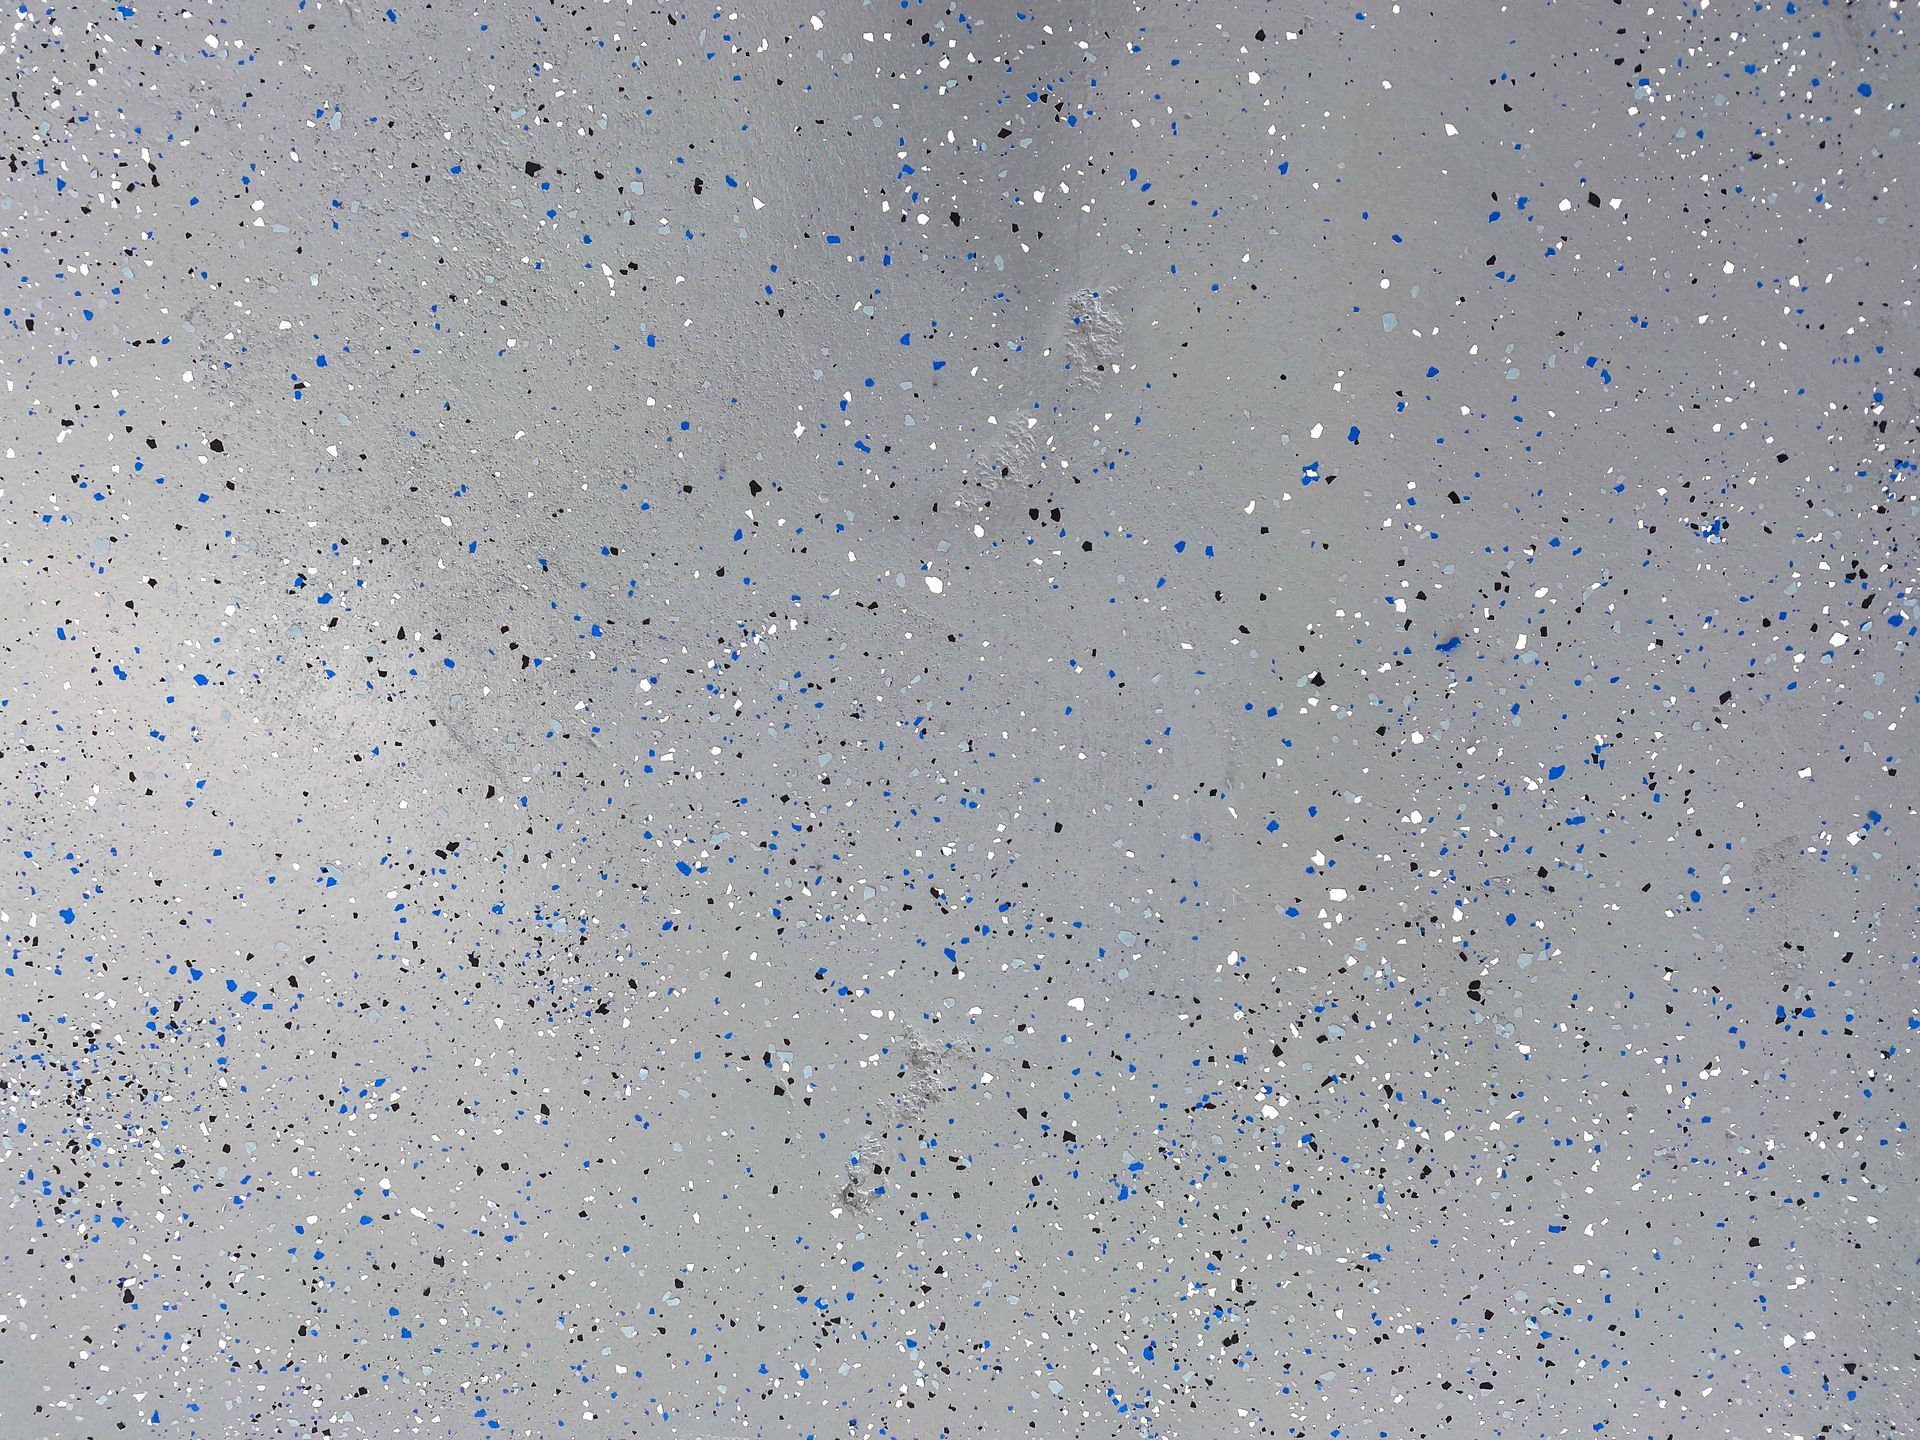
Once the initial drying phase is complete, the curing process begins. This stage involves the chemical reaction between the coating and the surrounding air, resulting in the formation of cross-links that give the coating its strength and durability. Curing times can vary depending on factors such as temperature, humidity, and the type of coating used. In general, full curing may take several days to a week or more.
Temperature and Humidity Considerations
Temperature and humidity play significant roles in the drying and curing process of floor coatings. Ideally, the ambient temperature should be within the manufacturer's recommended range for optimal drying and curing. High temperatures can accelerate drying and curing but may also lead to premature skinning or bubbling of the coating. Conversely, low temperatures can slow down the process and affect the quality of the finish. Similarly, humidity levels should be moderate to prevent moisture-related issues such as blushing or adhesion failure.
Ventilation and Air Circulation
Proper ventilation and air circulation are crucial during the drying and curing process to facilitate evaporation of solvents or water and promote uniform curing. Ensure that the space is well-ventilated by opening windows or using fans to circulate air. Avoid sealing off the area or trapping moisture, as this can prolong drying and curing times and compromise the quality of the finish.
Avoiding Premature Use
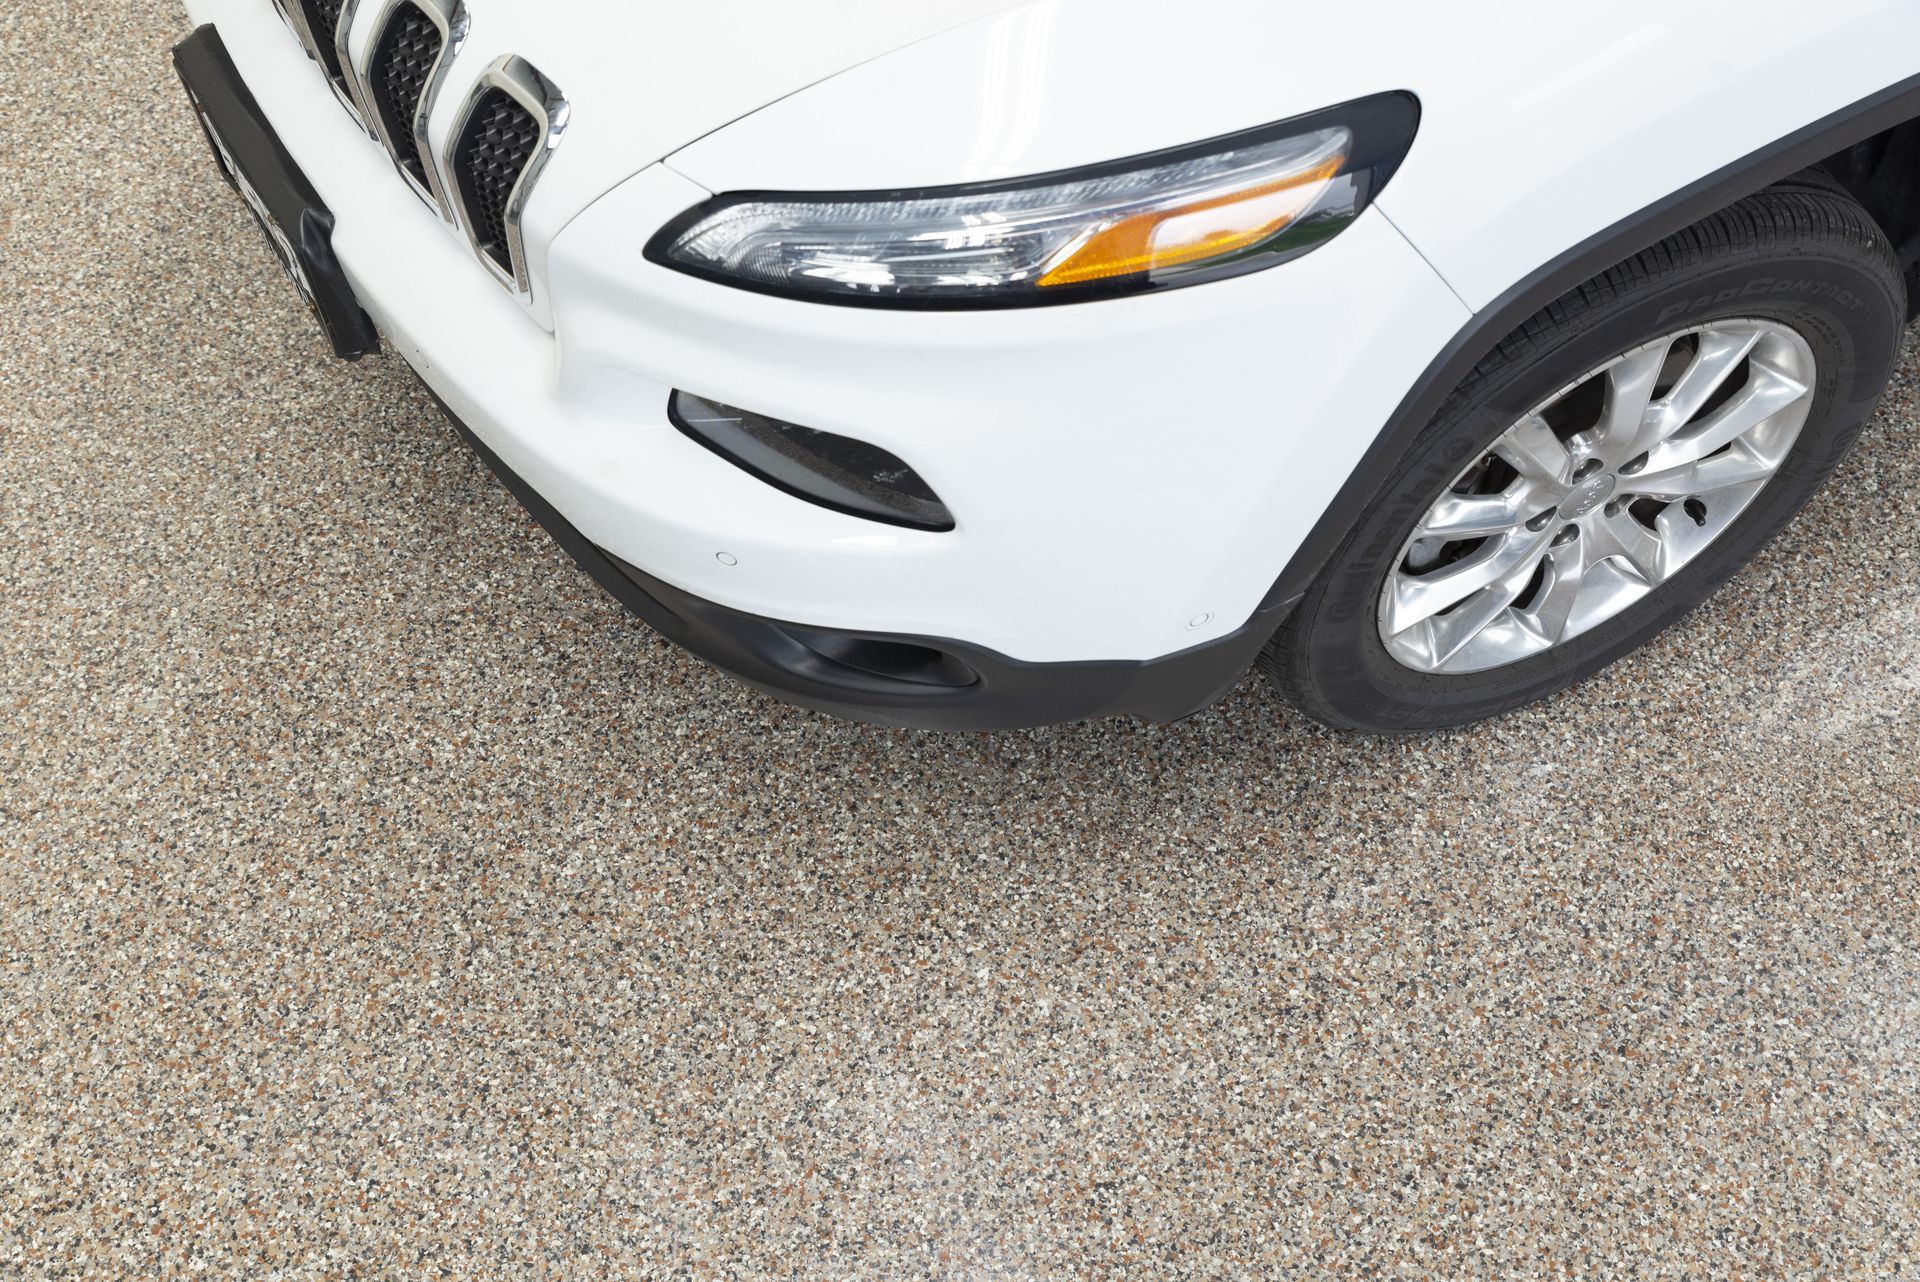
It's essential to exercise patience and avoid premature use of the coated surface during the drying and curing process. Walking, driving, or placing heavy objects on the floor before it's fully cured can result in damage, marring, or adhesion issues. Follow the manufacturer's recommendations for curing times and avoid heavy traffic or excessive wear until the coating has fully cured.
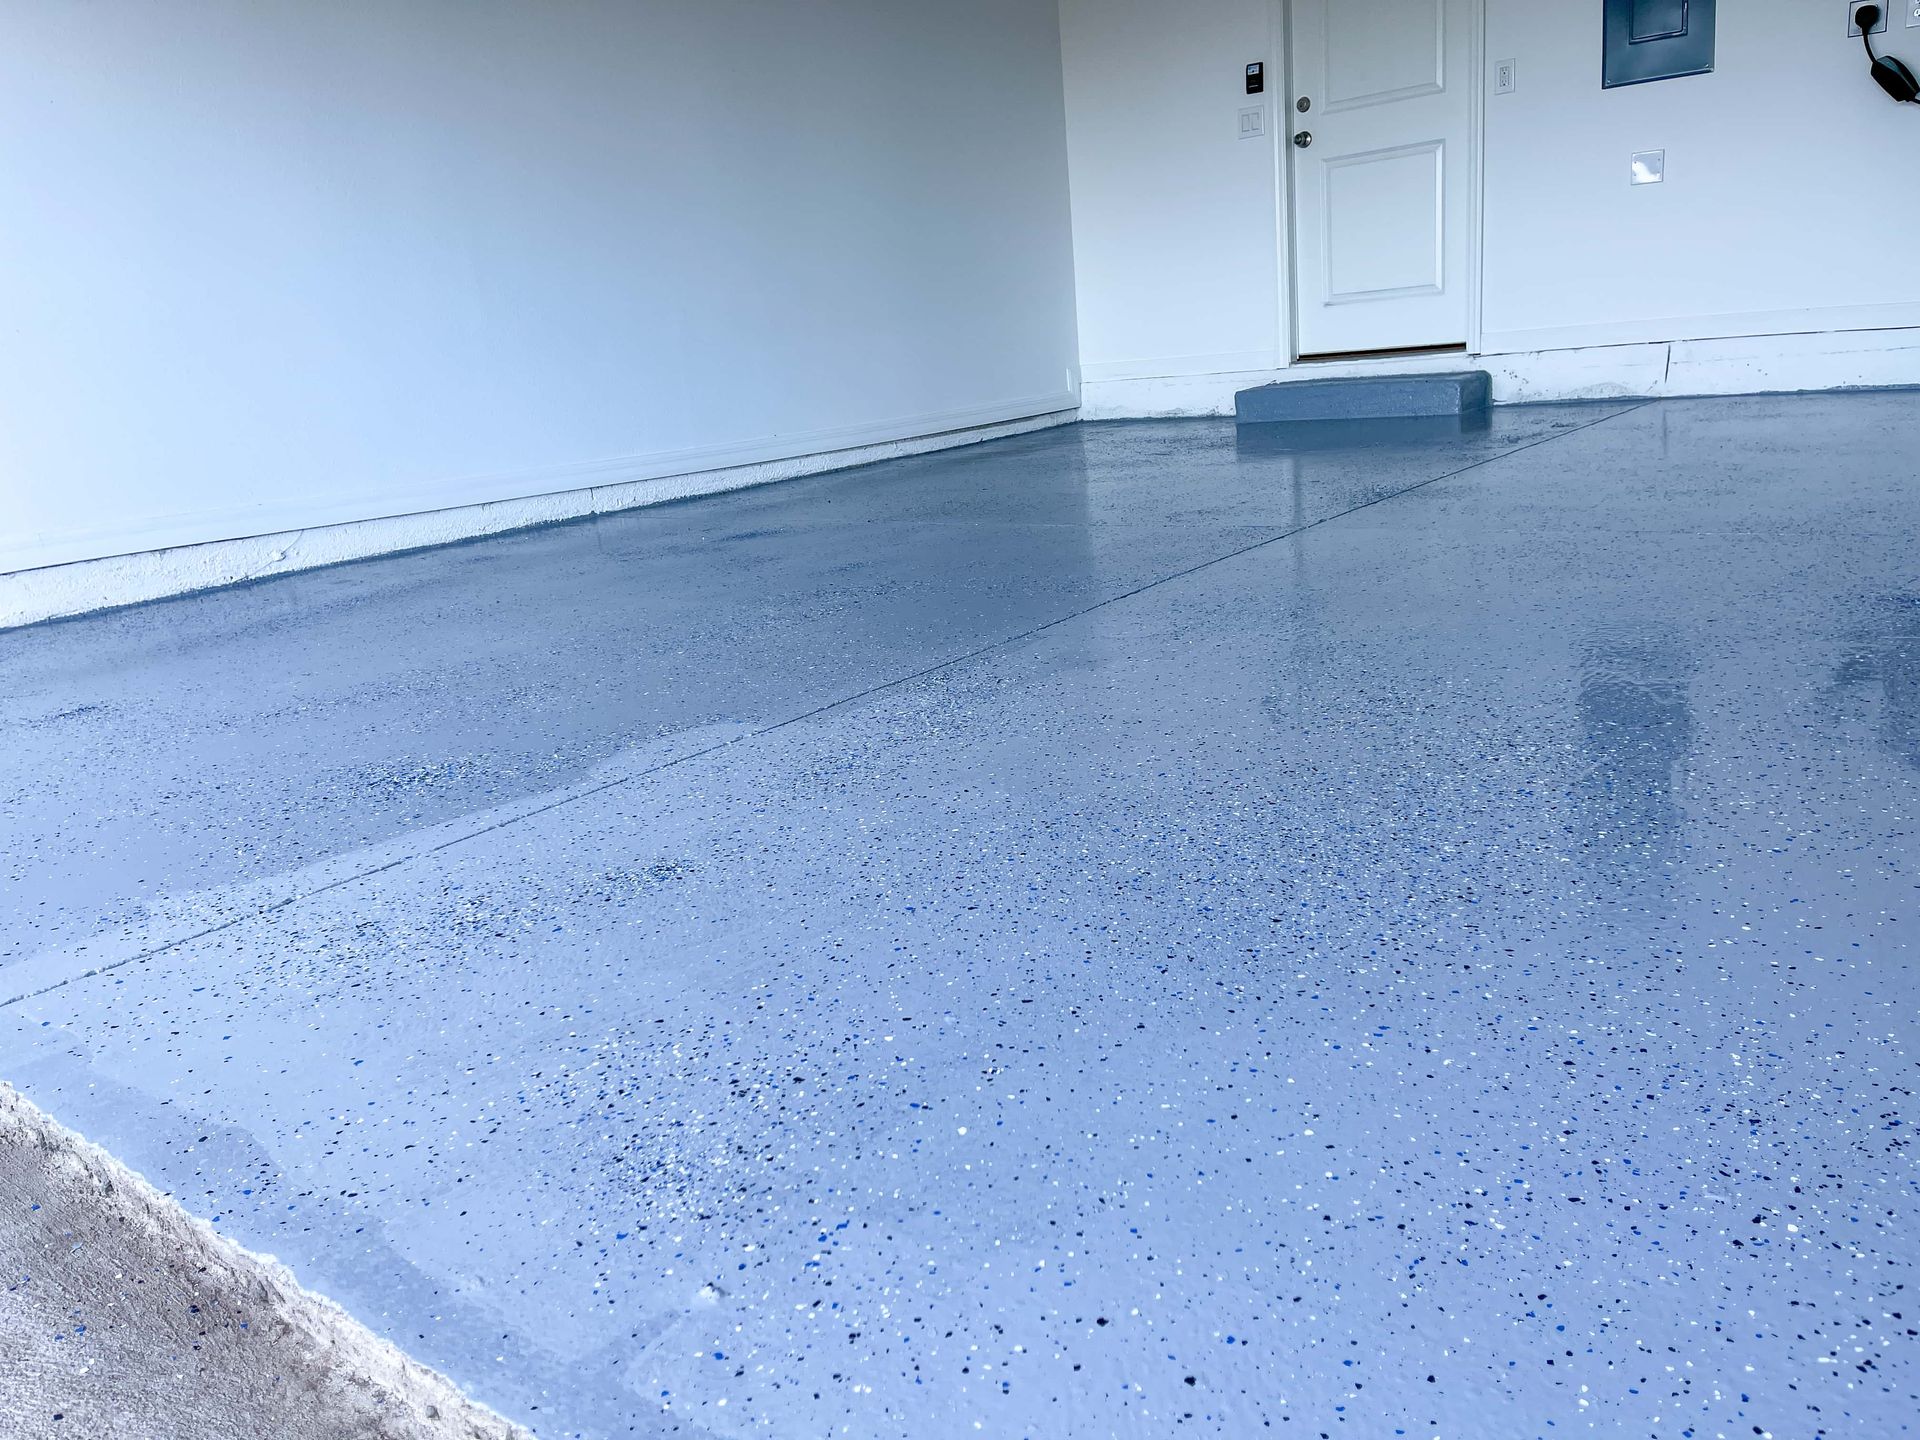
In conclusion, understanding the drying and curing process of floor coatings is essential for achieving optimal results and ensuring the longevity of your investment. By familiarizing yourself with the stages of drying and curing, considering temperature and humidity conditions, promoting ventilation and air circulation, and avoiding premature use, you can enjoy a beautifully coated floor that withstands the test of time. If you're considering coating your garage floor or other surfaces, contact Brookhaven Garage Floor for expert advice and professional installation services. We're here to help you transform your space with high-quality floor coatings that enhance both aesthetics and functionality.
Whether you use your garage for storage, as a workshop, or simply as a parking space, investing in the right floor coating can make a world of difference. In this ultimate guide to garage floor coatings, we'll explore everything you need to know to make an informed decision and transform your garage into a space you'll love. Understanding Your Options Before diving into the world of garage floor coatings, it's essential to understand your options. The three primary types of coatings are epoxy, polyurea, and polyaspartic. Epoxy coatings are popular for their durability and affordability, while polyurea and polyaspartic coatings offer superior performance and faster curing times. Each type has its advantages and disadvantages, so it's crucial to consider your specific needs and budget before making a decision. Assessing Your Needs When choosing a garage floor coating, it's essential to assess your needs and priorities. Are you primarily concerned with durability? Do you want a coating that can withstand heavy traffic and spills? Are you looking for a low-maintenance option that's easy to clean? By identifying your priorities, you can narrow down your options and choose a coating that meets your specific requirements. Surface Preparation Proper surface preparation is key to ensuring a successful garage floor coating application. Before applying any coating, it's essential to thoroughly clean and degrease the surface to remove any dirt, oil, or contaminants. Depending on the condition of your floor, you may also need to repair any cracks or imperfections and etch the surface to promote adhesion. Taking the time to properly prepare your garage floor will ensure that your coating adheres properly and provides long-lasting protection. Application Techniques The application technique you choose can have a significant impact on the final result of your garage floor coating. While some coatings can be applied with a roller or brush, others may require specialized equipment such as a squeegee or sprayer. It's essential to follow the manufacturer's instructions carefully and use the appropriate tools and techniques for the best results. If you're unsure about how to apply your chosen coating, don't hesitate to seek professional assistance. Curing and Drying Times Curing and drying times can vary significantly depending on the type of garage floor coating you choose. Epoxy coatings typically require several days to cure fully, while polyurea and polyaspartic coatings can cure in a matter of hours. It's essential to factor in curing and drying times when planning your project to ensure that you allow sufficient time for the coating to cure before using your garage. Additionally, be sure to follow any recommended curing procedures to maximize the durability and longevity of your coating. Maintenance and Care Once your garage floor coating is in place, proper maintenance is essential to keep it looking its best. While most coatings are relatively low-maintenance, it's essential to clean up spills promptly and avoid dragging heavy objects across the surface to prevent damage. Depending on the type of coating you choose, you may also need to reapply a topcoat periodically to maintain its appearance and protection. A well-chosen garage floor coating can transform your garage from a utilitarian space into a functional and attractive extension of your home. By understanding your options, assessing your needs, and following proper application and maintenance procedures, you can ensure that your garage floor coating provides long-lasting protection and enhances the value and usability of your home. So why wait? Start planning your garage floor coating project today and take your garage to the next level.
While epoxy has long been a popular option, recent advancements in technology have paved the way for superior alternatives: polyurea and polyaspartic coatings. In this article, we delve into the reasons why these cutting-edge coatings outshine epoxy in terms of durability, versatility, and performance. Rapid Curing: Time is of the Essence One of the most significant advantages of polyurea and polyaspartic coatings is their rapid curing time. Unlike epoxy, which can take days to fully cure, polyurea and polyaspartic coatings boast an incredibly fast curing process, often drying within a matter of hours. This means less downtime for your project and faster return to normal use of the surface. Whether you're coating a garage floor, a commercial space, or an industrial facility, polyurea and polyaspartic coatings allow you to get back to business in record time. Enhanced Durability: Built to Last While epoxy coatings offer decent durability, polyurea and polyaspartic coatings take it to the next level. These coatings are engineered to withstand heavy traffic, harsh chemicals, and extreme temperatures without cracking, peeling, or fading. Whether subjected to the rigors of daily vehicle traffic in a garage or the corrosive effects of industrial chemicals in a manufacturing facility, polyurea and polyaspartic coatings provide unmatched protection that stands the test of time. Flexibility and Adhesion: Adapting to the Surface One of the key reasons why polyurea and polyaspartic coatings outperform epoxy is their superior flexibility and adhesion properties. Unlike epoxy, which can be prone to cracking and delamination, polyurea and polyaspartic coatings form a seamless bond with the substrate, expanding and contracting with changes in temperature and humidity. This flexibility ensures long-term adhesion and prevents moisture and contaminants from seeping beneath the surface, leading to a longer-lasting finish. UV Stability: Resisting the Elements Another area where polyurea and polyaspartic coatings shine is in their UV stability. While epoxy coatings can yellow and degrade when exposed to sunlight, polyurea and polyaspartic coatings are formulated to resist UV damage, maintaining their clarity and color over time. Whether used indoors or outdoors, these coatings offer superior protection against the harmful effects of UV radiation, ensuring that your surfaces retain their beauty and integrity for years to come. Seamless Application: A Perfect Finish Every Time Polyurea and polyaspartic coatings offer a seamless application process that yields flawless results every time. Unlike epoxy, which can be tricky to apply and may require multiple coats for adequate coverage, polyurea and polyaspartic coatings can be applied in a single coat, saving time, labor, and materials. Additionally, their self-leveling properties ensure a smooth, uniform finish with minimal effort, making them the ideal choice for projects where aesthetics are paramount. Environmentally Friendly: A Greener Option Last but not least, polyurea and polyaspartic coatings are environmentally friendly alternatives to epoxy. Unlike epoxy, which often contains harmful VOCs (volatile organic compounds), polyurea and polyaspartic coatings emit low to zero VOCs during application, making them safer for both the environment and human health. Additionally, their fast curing time reduces energy consumption and minimizes environmental impact, making them a greener choice for eco-conscious consumers. At Brookhaven Garage Floor, we take pride in offering the highest quality polyurea and polyaspartic coatings on the market. With our expertise and dedication to customer satisfaction, we provide a seamless experience from consultation to completion, ensuring that your surfaces receive the protection and enhancement they deserve. Don't settle for ordinary epoxy coatings when you can enjoy the superior performance and durability of polyurea and polyaspartic coatings.
They possess the unique ability to breathe new life into tired surfaces, adding depth, character, and durability in one fell swoop. Among the myriad options available, textured coatings stand out for their versatility and aesthetic appeal. Today, we embark on a journey to explore the realm of textured floor coatings, uncovering their secrets and showcasing how they can elevate your space. The Artistry of Texture Imagine stepping into a space where every footfall tells a story, where the floor beneath your feet is not just a surface but a canvas of texture. Textured floor coatings are the artisans of this narrative, offering a tactile experience that engages the senses and sparks curiosity. From subtle ripples to bold patterns, these coatings invite exploration, adding an element of surprise to every room they grace. Depth Beyond Measure One of the most remarkable qualities of textured floor coatings is their ability to create the illusion of depth. Through clever design and application techniques, these coatings can mimic the look and feel of natural materials such as stone, wood, or even leather. Whether you desire the rustic charm of a cobblestone pathway or the sleek elegance of polished concrete, textured coatings can fulfill your vision with unparalleled precision. Dimensional Delights In the world of design, dimension is king. Textured floor coatings excel in this domain, offering a three-dimensional experience that captivates the eye and captivates the imagination. By playing with light and shadow, these coatings can transform a flat surface into a dynamic landscape, full of peaks and valleys waiting to be explored. The result is a visual feast that adds intrigue and sophistication to any space. Durability Redefined Beyond their aesthetic appeal, textured floor coatings are prized for their durability and resilience. Engineered to withstand the rigors of daily life, these coatings offer protection against scratches, stains, and UV damage, ensuring that your surfaces retain their beauty for years to come. Whether applied to garage floors, patios, or indoor living spaces, textured coatings provide a reliable shield against wear and tear, making them an ideal choice for homeowners seeking both style and substance. Seamless Integration One of the greatest strengths of textured floor coatings lies in their versatility. Unlike traditional flooring materials, which often require extensive preparation and installation, textured coatings can be applied directly onto existing surfaces with minimal fuss. Whether you're renovating a kitchen, revamping a basement, or upgrading a commercial space, textured coatings offer a seamless solution that saves both time and money. At Brookhaven Garage Floor, we understand the transformative power of textured coatings better than anyone. With years of experience in the industry, we have honed our craft to perfection, offering a range of coatings that combine beauty, durability, and affordability in equal measure. Our team of skilled professionals is committed to bringing your vision to life, working closely with you to create custom solutions that exceed your expectations. In the world of home improvement, few things hold as much promise as textured floor coatings. With their ability to add depth, dimension, and durability to any surface, these coatings offer a unique opportunity to elevate your space and leave a lasting impression. Whether you're seeking to rejuvenate a tired garage floor or transform an entire living area, textured coatings provide a versatile and stylish solution that stands the test of time. So why wait? Take the first step towards a brighter, more beautiful future with Brookhaven Garage Floor today.
Today, we're exploring the critical influence of temperature and humidity on floor coating application. Understanding and managing these factors are essential for unlocking the full potential of your floor coating project. The Temperature and Humidity Dance: Temperature and humidity aren't mere environmental variables; they significantly impact the success of floor coating application. Here's how: Temperature - affects the viscosity of coating materials, determining how easily they spread and adhere to surfaces. Higher temperatures typically result in lower viscosity, making coatings easier to apply. Conversely, lower temperatures increase viscosity, potentially leading to uneven application and reduced coverage. Additionally, temperature influences the curing rate of coatings. Warmer temperatures accelerate curing, while cooler temperatures slow it down. Optimal curing conditions ensure the formation of a durable, long-lasting finish. Humidity - Humidity refers to the moisture content in the air, which can profoundly affect coating application. Here's how humidity comes into play: Moisture Absorption High humidity levels can cause coatings to absorb moisture from the air, leading to adhesion issues and defects like blistering and delamination. Drying Time High humidity slows down the drying process by inhibiting solvent evaporation. This extended drying time increases the risk of surface imperfections and compromises the quality of the finish. Best Practices for Floor Coating Application: To ensure successful floor coating application, follow these best practices: Monitor Environmental Conditions - Before starting your project, assess the temperature and humidity levels in the application area. Aim for conditions within the manufacturer's recommended range for optimal results. Climate Control - Use climate control equipment such as heaters, dehumidifiers, or air conditioners to regulate the environment during application and curing. This helps maintain ideal conditions and promotes proper curing of the coating. Plan Accordingly - Schedule your floor coating project during seasons or times of the day when temperature and humidity are conducive to successful application and curing. Avoid peak humidity periods or extreme temperature fluctuations whenever possible. Follow Manufacturer Guidelines - Always adhere to the manufacturer's instructions regarding application temperature, humidity tolerances, and recommended application techniques. Deviating from these guidelines can compromise the integrity of the coating. Conduct Moisture Testing - Prior to application, perform moisture testing on the substrate to assess its moisture content. Address any moisture issues before proceeding with coating application to prevent adhesion failures. Mastering the interplay between temperature and humidity is essential for achieving impeccable results in floor coating application. By understanding their impact and implementing best practices, you can ensure a smooth, durable finish that enhances the aesthetic appeal and functionality of your floors. At Brookhaven Garage Floor, we're here to support you every step of the way on your journey to floor coating excellence. Stay tuned for more expert tips and insights!
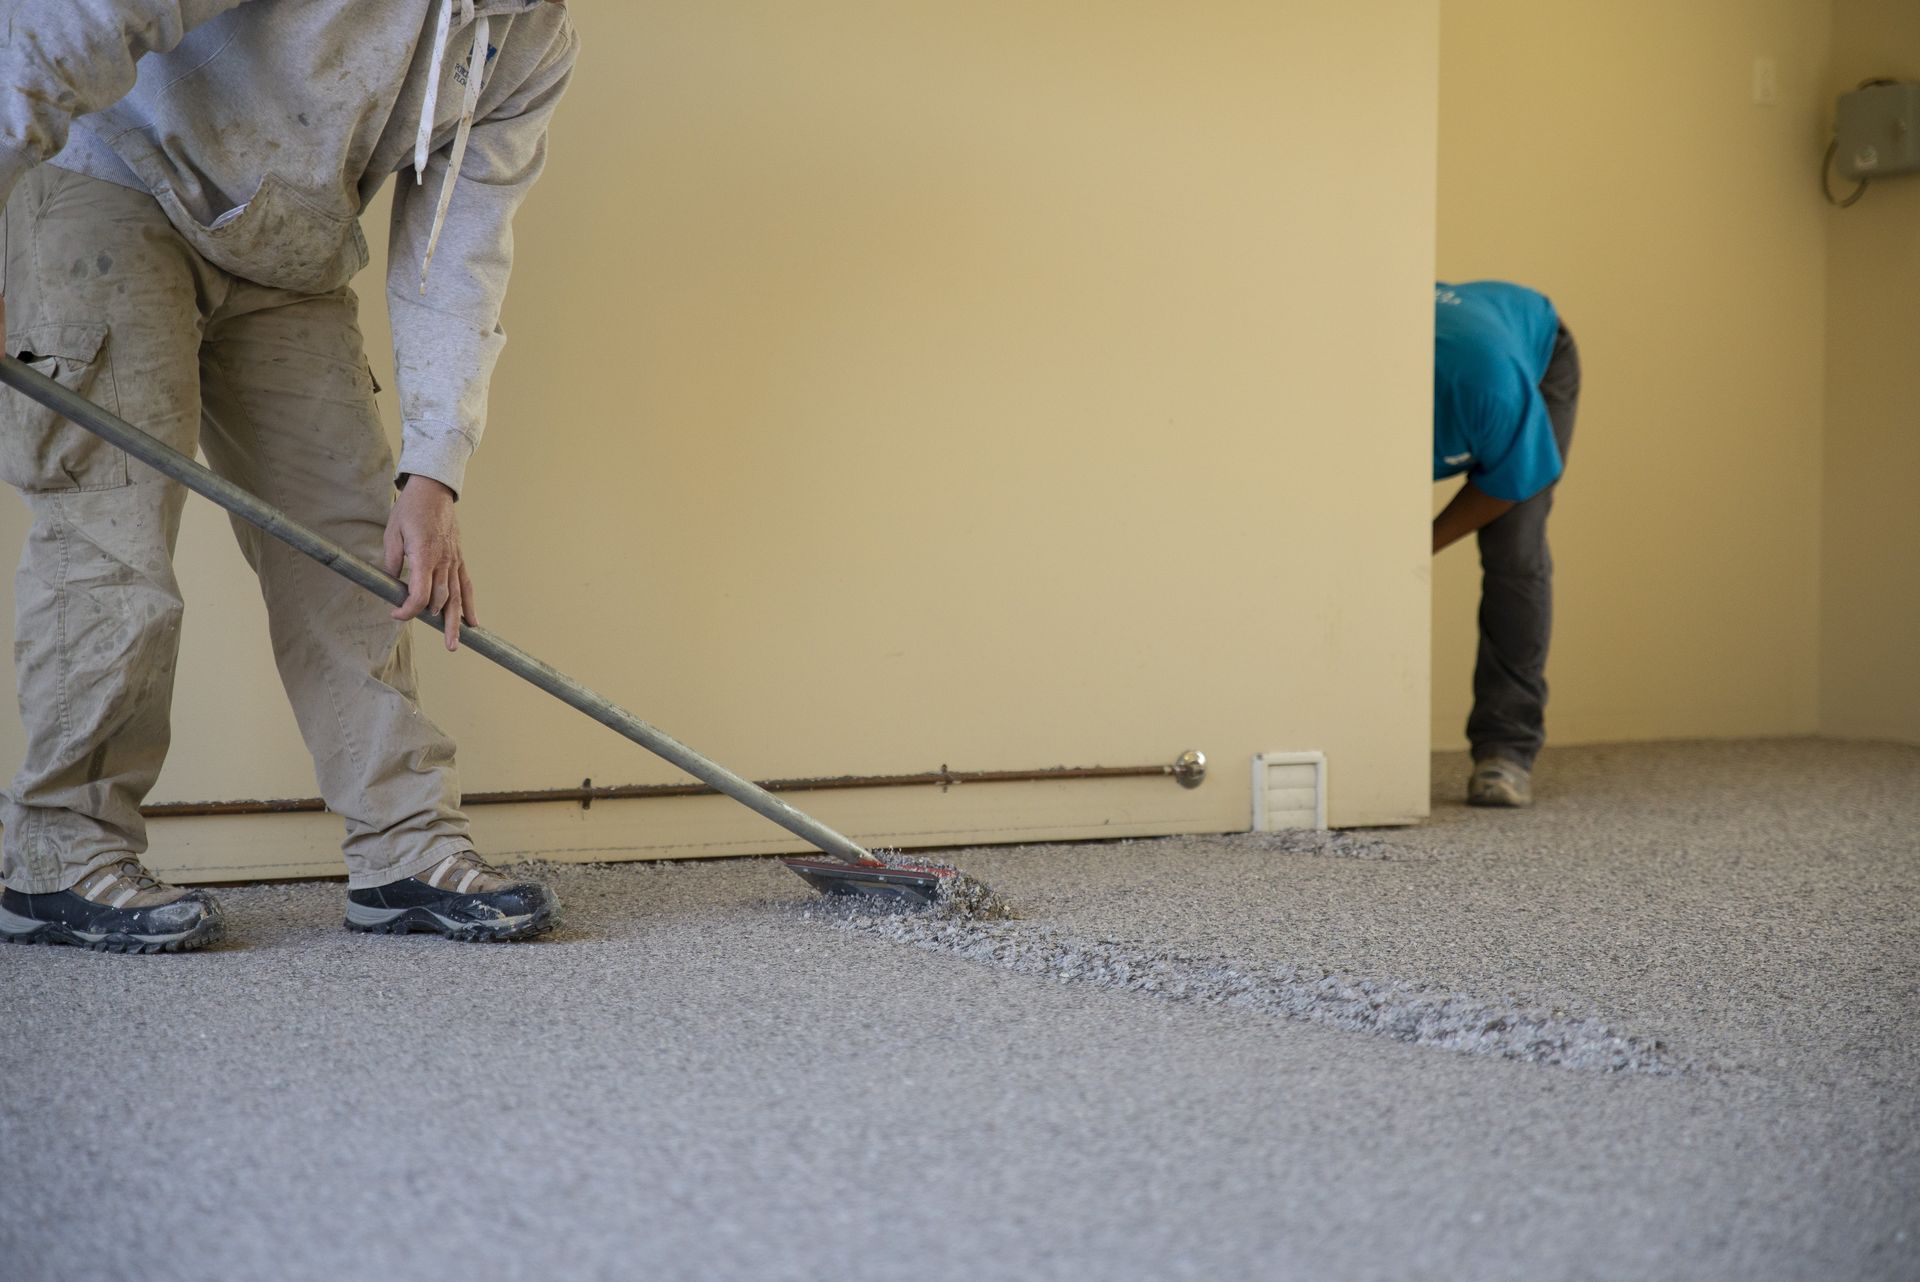
Proper preparation not only helps to maximize the adhesion and durability of the coating but also minimizes the risk of issues such as peeling, bubbling, or discoloration down the line. In this blog post, we'll outline the essential steps for preparing your garage for floor coating installation, ensuring a smooth process and optimal results. Clear Out the Space The first step in preparing your garage for floor coating installation is to clear out the space completely. Remove all vehicles, tools, equipment, and other items from the garage to create a clean, empty workspace. This allows the installers to have unrestricted access to the entire floor surface and ensures that no obstacles interfere with the installation process. Clean the Floor Thoroughly Once the garage is empty, thoroughly clean the floor to remove any dirt, oil, grease, or other contaminants that could interfere with the adhesion of the floor coating. Sweep the floor to remove loose debris, then scrub the surface with a degreaser or concrete cleaner and rinse thoroughly with water. For stubborn stains or residues, consider using a pressure washer to ensure a clean, residue-free surface. Repair Any Damage Inspect the floor for any cracks, chips, or other damage that may need to be repaired before applying the floor coating. Fill any cracks or holes with a suitable concrete patching compound and smooth the surface with a trowel. Allow the patching compound to cure completely according to the manufacturer's instructions before proceeding to the next step. Etch or Grind the Surface To ensure proper adhesion of the floor coating, it's essential to etch or grind the surface of the concrete to create a rough texture. This allows the coating to penetrate and bond effectively with the concrete substrate. Depending on the condition of the floor and the type of coating being applied, you may need to use a chemical etcher or mechanical grinder to achieve the desired surface profile. Address Moisture Issues Moisture can compromise the adhesion and performance of floor coatings, so it's essential to address any moisture issues before proceeding with installation. Conduct a moisture test using a moisture meter or plastic sheet test to determine if moisture is present in the concrete. If moisture is detected, take steps to mitigate it, such as improving drainage, installing a vapor barrier, or using a moisture-blocking primer. Protect Surrounding Surfaces Before applying the floor coating, take precautions to protect surrounding surfaces from overspray or drips. Cover walls, cabinets, baseboards, and any other adjacent surfaces with plastic sheeting or painter's tape to prevent accidental damage or staining during the installation process. Follow Manufacturer's Instructions Finally, carefully review and follow the manufacturer's instructions for preparing and applying the floor coating. Different types of coatings may have specific requirements regarding surface preparation, application techniques, curing times, and environmental conditions. Adhering to these instructions ensures that you achieve the best possible results and maximize the performance and longevity of your floor coating. By following these essential steps for preparing your garage for floor coating installation, you can ensure a smooth process and optimal results. Proper preparation not only enhances the adhesion and durability of the coating but also minimizes the risk of issues such as peeling, bubbling, or discoloration. If you're ready to transform your garage with a professional floor coating installation, contact Brookhaven Garage Floor for expert advice and professional services. We're here to help you achieve a beautiful, durable floor that enhances the functionality and appearance of your garage for years to come.

When you think of floor coatings, you likely envision sleek garage floors or industrial settings. From residential spaces to commercial establishments, innovative uses of floor coatings are revolutionizing interior design and functionality. In this blog post, we'll explore some creative and unexpected ways to use floor coatings, inspiring you to think outside the box for your next project. Creative Flooring Designs: Floor coatings offer endless possibilities for creating custom flooring designs that reflect your unique style and personality. Whether you're looking to replicate the look of natural stone, hardwood, or decorative tiles, floor coatings can be customized to mimic virtually any surface. From intricate patterns to bold color combinations, the only limit is your imagination. Consider incorporating decorative elements such as stencils, stamps, or metallic accents to add visual interest and dimension to your floors. Artistic Murals and Graphics: Floor coatings provide a blank canvas for showcasing artistic murals and graphics that add character and charm to any space. Whether you want to transform a plain concrete floor into a vibrant work of art or create a whimsical scene in a children's playroom, floor coatings offer the perfect medium for unleashing your creativity. From abstract designs to intricate illustrations, the possibilities are truly endless. With the right techniques and materials, you can achieve stunning results that are sure to impress. Outdoor Living Spaces: Floor coatings aren't just for indoor use—they can also be used to enhance outdoor living spaces such as patios, decks, and pool surrounds. By applying a durable, weather-resistant coating to outdoor surfaces, you can create a seamless transition between indoor and outdoor areas while adding beauty and functionality to your outdoor living space. Choose from a wide range of colors, textures, and finishes to complement your outdoor decor and landscaping. Commercial and Retail Environments: In commercial and retail environments, floor coatings can play a crucial role in branding, safety, and customer experience. Use floor coatings to create eye-catching logos, signage, or wayfinding markers that guide customers through your space. Incorporate non-slip coatings in high-traffic areas to enhance safety and prevent slips and falls. Choose durable, easy-to-clean coatings that withstand heavy foot traffic and maintain their appearance over time, ensuring a positive impression on customers and clients. Healthcare and Hospitality Settings: Floor coatings are ideal for healthcare and hospitality settings where cleanliness, durability, and aesthetics are paramount. In hospitals and medical facilities, seamless, non-porous floor coatings provide a hygienic surface that is easy to clean and disinfect, helping to reduce the risk of healthcare-associated infections. In hotels, resorts, and restaurants, decorative floor coatings can create a welcoming atmosphere that enhances the overall guest experience. Choose coatings with antimicrobial properties for added protection against germs and bacteria. DIY Projects and Home Improvement: Floor coatings aren't just for professional installers—DIY enthusiasts can also take advantage of their versatility and ease of use. Whether you're updating your basement floor, refinishing your patio, or revamping your garage, floor coatings offer a cost-effective, DIY-friendly solution for transforming your space. With a bit of preparation and the right tools, you can achieve professional-looking results that rival those of a professional installer. In conclusion, the innovative uses of floor coatings extend far beyond traditional applications, offering endless possibilities for creativity and customization. Whether you're looking to create custom flooring designs, showcase artistic murals, enhance outdoor living spaces, or elevate commercial environments, floor coatings provide a versatile and durable solution that meets your needs. If you're ready to think outside the box and explore the potential of floor coatings for your next project, contact Brookhaven Garage Floor for expert advice and professional installation services. We're here to help you bring your vision to life and transform your space with innovative floor coatings that enhance both aesthetics and functionality.
With the right floor coating and color choice, you can transform your garage into a stylish and inviting space that complements your home's aesthetic. Selecting the perfect color for your floor coating is an important decision that can enhance the overall look and feel of your garage. In this blog post, we'll explore some tips for choosing the right colors for your floor coatings to match your style and create a cohesive design scheme. Consider Your Existing Décor When selecting a color for your garage floor coating, it's essential to consider the existing décor and design elements in your home. Take note of the colors, patterns, and materials used in adjacent rooms and choose a floor coating color that complements or enhances these features. For example, if your home has a modern, minimalist style with neutral color palettes, consider opting for a sleek, monochromatic floor coating in shades of gray or beige. Alternatively, if your home features bold colors or eclectic décor, you may want to choose a floor coating color that adds contrast or complements these elements. Reflect Your Personal Style Your garage is an extension of your home, so it's essential to choose a floor coating color that reflects your personal style and preferences. Whether you prefer a classic, timeless look or a more contemporary, trendy vibe, there are floor coating colors available to suit every taste. If you're drawn to classic design aesthetics, consider opting for neutral colors such as white, beige, or gray for your garage floor coating. These versatile shades provide a clean, timeless backdrop that pairs well with a variety of design styles and décor choices. On the other hand, if you're looking to make a statement and add personality to your garage, don't be afraid to experiment with bolder colors and finishes. Consider vibrant hues like blue, red, or green to infuse your space with energy and personality. You can also explore decorative options such as metallic flakes or decorative chips to add texture and visual interest to your garage floor. Think About Functionality While aesthetics are important, it's also essential to consider the functionality and practicality of your garage floor coating color. Lighter colors such as white or beige can help brighten up the space and make it feel larger and more open, which can be beneficial if you use your garage as a workshop or storage area. However, it's essential to keep in mind that lighter colors may show dirt, stains, and tire marks more easily than darker colors. If you're concerned about maintenance and upkeep, you may want to opt for a darker floor coating color such as charcoal gray or black, which can help conceal imperfections and maintain a clean appearance over time. Seek Inspiration If you're feeling overwhelmed by the multitude of color options available for garage floor coatings, seek inspiration from design magazines, websites, and social media platforms. Create a mood board or Pinterest board to gather images of garage spaces that resonate with your style and preferences. Pay attention to color palettes, patterns, and design elements that catch your eye, and use them as a starting point for selecting the perfect floor coating color for your garage. You can also consult with design professionals or flooring experts for personalized recommendations and guidance based on your specific needs and preferences. Test Samples Before committing to a floor coating color for your garage, it's essential to test samples in your space to see how they look in different lighting conditions and against your existing décor. Many manufacturers offer sample kits or swatches that allow you to see how various colors and finishes will appear on your garage floor. Take the time to test multiple samples and observe how they interact with natural and artificial light throughout the day. Consider how each color complements your garage's architecture, furnishings, and other design elements, and choose the one that best achieves the look and feel you desire. Conclusion Choosing the right color for your garage floor coating is a crucial step in creating a functional and stylish space that reflects your personality and complements your home's aesthetic. By considering your existing décor, personal style, functionality needs, and seeking inspiration from design resources, you can select a floor coating color that enhances the overall look and feel of your garage. With careful consideration and attention to detail, you can transform your garage into a welcoming and visually appealing space that you'll be proud to show off to family and friends.
Whether you have a patio, deck, or garage floor, maintaining your coated surfaces is essential for preserving their beauty and durability. In this blog post, we'll share some valuable summer maintenance tips to help you keep your coated outdoor spaces looking great all season long, brought to you by Brookhaven Garage Floor. 1. Regular Cleaning Regular cleaning is key to preserving the appearance and longevity of your coated outdoor surfaces. Sweep away dirt, debris, and leaves regularly to prevent scratches and abrasions. For deeper cleaning, use a mild detergent and water solution to gently scrub the surface. Avoid harsh chemicals or abrasive cleaners, as they can damage the coating and compromise its integrity. 2. Preventative Measures Prevention is better than cure, especially when it comes to outdoor maintenance. Place mats or rugs at entry points to capture dirt and moisture before they reach your coated surfaces. Use furniture pads or coasters to prevent scratching and gouging from heavy patio furniture. Consider adding a protective sealant or topcoat to enhance the durability of your coating and provide an extra layer of protection against UV rays and harsh weather conditions. 3. Address Stains Promptly Accidents happen, and spills are inevitable, especially during summer gatherings and barbecues. Address stains promptly to prevent them from setting into the coating. Blot spills with a clean cloth or paper towel as soon as they occur, then gently clean the area with a mild detergent and water solution. For stubborn stains, you may need to use a specialized cleaner or degreaser recommended by your coating manufacturer. 4. Maintain Proper Drainage Proper drainage is essential for preventing water damage and prolonging the life of your coated outdoor surfaces. Ensure that your patio, deck, or garage floor has adequate drainage to prevent standing water from pooling and causing discoloration or deterioration of the coating. Clean out gutters and downspouts regularly to prevent water from overflowing onto your coated surfaces during heavy rainstorms. 5. Avoid Heavy Traffic Minimize heavy foot traffic and vehicular traffic on your coated outdoor surfaces, especially during hot summer days when the coating is more susceptible to damage. Encourage guests to use designated walkways and parking areas to reduce wear and tear on the coating. Consider placing protective mats or pavers in high-traffic areas to distribute weight and prevent indentations. 6. Schedule Regular Inspections Finally, schedule regular inspections of your coated outdoor surfaces to identify any signs of wear, damage, or deterioration early on. Look for cracks, chips, peeling, or discoloration that may indicate underlying issues with the coating. Addressing these issues promptly can help prevent further damage and extend the life of your coating. Don't let summer take a toll on your coated outdoor surfaces. Follow these maintenance tips to keep your floors looking great year-round.